Thursday, March 31, 2011

Cook: FJ Chicken Chorizo and Seafood Paella


This may not the most traditional or authentic paella (for one, I used a large all clad deep skillet because we do not own a paella pan; secondly most paellas are either meat or seafood but I went for a combo!), but it certainly is delicious and spectacular! All paella must have three important components: 1) the sofrito base, 2) the rice (short grain and starchy) and 3) saffron.

This recipe is a little more labor intensive then most of the recipes posted on this blog, but it is so worth it. The following recipe makes 6-8 hearty servings.

FJ Chicken Chorizo and Seafood Paella

Ingredients:

  • 4 cloves garlic, chopped
  • 1 red pepper sliced into strips
  • 1 green pepper sliced into strips
  • 3 large (4 medium) tomatoes chopped
  • 1 small onion chopped
  • 1/4 tsp Saffron (or a hearty pinch)*
  • 2 1/2 to 3 cups of Valencia or Arborio rice
  • pinch of paprika
  • pinch of cayenne pepper
  • 1-2  lemon
  • 1 small bunch parsley
  • 1 lb chicken breast (boneless, skinless) chopped into pieces
  • 1/2 lb spicy dry chorizo, casing removed and sliced
  • 12 fresh mussels, 12 fresh clams, 12 shrimp (raw with shells removed except tail)
Directions:

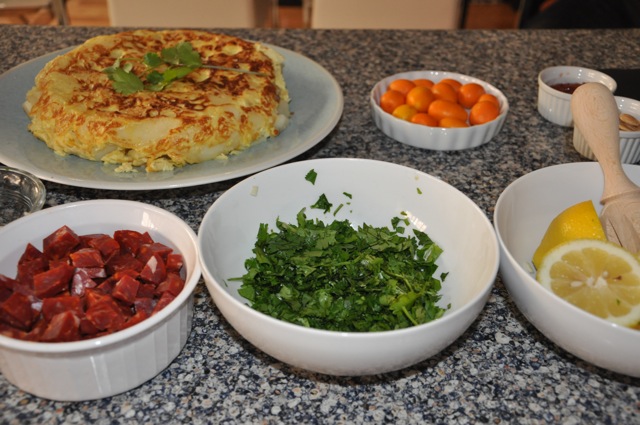
Start by making the sofrito: Heat a large saute pan or paella pan.  Add a generous drizzle of olive oil and add chopped garlic and onion, red and green peppers and the tomatoes. Cook for 5-10 minutes until the veggies are soft
In a separate small pan, brown the chicken in olive oil, remove from heat. Add the browned chicken and chorizo to the softened vegetable sofrito, let it bubble for 1-2 minutes.  Add the rice! Stir the rice continually in the sofrito until the pan becomes nice and dry (the rice should absorb all the liquid)


  • When pan is dry, it's time to add more liquid. Add water to cover the rice plus 1/2 an inch more.  Add the saffron.
  • Only stir the paella occasionally at this point to make sure the rice isn't sticking (burning) to the bottom of the pan. you don't want to overstir or the rice will start to break down and release too much starch. 
  • Once the liquid is all absorbed, taste rice for doneness. Add liquid little by little (similar strategy for making risotto) until rice is done. 
  • Add the seafood now as well as the edamame (or peas). Stop stirring. Turn down the heat, cover the paella pan with aluminum foil and let it gently simmer for 10-15 minutes 
  • Remove foil, test for saltiness. Add salt to taste, paprika and/or cayenne pepper.  Squeeze some lemon juice and toss some chopped parsley into the mix.


Wednesday, March 30, 2011

Cook: Tortilla Espanola with Sofrito


Lucky for me, J is a master of making tortilla espanola. This is a very typical Spanish dish that is essentially an egg omelette with fried potatoes.  You can find at most Tapas restaurants in the US, and pretty much everywhere in Spain (at least where we've travelled which includes together and separately - Barcelona, Madrid, Granada, etc).   One of the tastiest snacks ever is a sandwich made of french bread and tortilla espanola with some jamon serrano. We had this pretty much every day we were in Spain and never got sick of it.

If you're planning on having a spanish themed dinner, please do try this recipe. It is so delicious!

In order to make the Tortilla Espanola, you will need:
  • 1 large frying pan for frying potatoes and onions; 1 medium frying pan for cooking the tortilla
  • potato peeler
  • 2 mixing bowls - 1 large and 1 small 
  • 6-7 medium potatoes, peeled
  • 1 whole onion chopped
  • 5-6 large eggs
  • 2-3 cups of olive oil for pan frying
  • salt to taste. 
Rather than type out the instructions, here is a link to the step by step instructions with pictures that J uses:  http://spanishfood.about.com/od/tapas/ss/tortilla.htm

The tortilla is fantastic alone or with aioli. We like to serve it with Sofrito. Sofrito is a basis of many spanish foods (including paella - recipe will be shared tomorrow!) Ingredients include tomatoes, onions, garlic, green peppers and olive oil. It makes a delicious accompaniment to tortilla

Sofrito
Ingredients:
  • 1 can crushed tomatoes (28-29oz)
  • 1 long green pepper (not hot)
  • 1 yellow onion
  • 1 clove garlic
  • extra virgin olive oil
  • 1 tsp paprika
  • salt and pepper to taste
Directions:
  1. Finely chop the onion and garlic
  2. Chop the pepper into small pieces (1/4'' or smaller)
  3. Heat a large saute pan over medium pan
  4. Drizzle with olive oil.  Add onions and saute until transparent (reduce heat if necessary so onion won't burn). Add the green pepper and cook for 5 minutes, adding olive oil if necessary. Stir constantly so the vegetable don't burn.
  5. Add the minced garlic, saute for another minute. 
  6. Pour the crushed tomatoes and paprika into the pan and mix well. 
  7. Simmer for 10-15 minutes. Salt and pepper to taste.

Tuesday, March 29, 2011

Cook: Seared Squid, Olive, Tomato and Arugula Salad

J and I decided to make a Spanish feast this past weekend so we put together a menu which included cheese & charcuterie, seared squid salad, tortilla espanola, paella and red wine soaked oranges for dessert.  Each day this week, I'll post a recipe so that by next weekend, you can recreate this meal yourself!

This sexy and sensational salad is super easy and sure to make your guests swoon!  :) The only thing is that you should plan ahead since it is best to marinate it for at least 3 hours.

Seared Squid, Olive, Tomato and Arugula Salad


Ingredients:
1 lb squid tubes and tentacles, cleaned
3 cloves garlic, chopped
1 lemon zested
1 jalapeno chili, finely chopped
1 small bunch parsley, chopped
extra virgin olive oil
1 bag salad arugula.
handful of cherry or grape tomatoes
small handful of kalamata olives

Directions:
  1. Clean squid and cut tubes in half lengthwise. Remove any extra cartilage or particles (we did not have to do anything with the squid we bought from Whole Foods).  Rinse and pat dry (with paper towel)
  2. Marinate the squid with garlic, chili, lemon zest and parsley for a minimum of 3 hours, or a maximum of a day.
  3. When ready to cook, heat a saute pan over high heat. Drizzle with olive oil and sear until the squid is just cooked (approx 1 minute - it will be opaque throughout) - do NOT overcook!  Remove from pan. Squeeze some lemon juice over cooked squid
  4. In the pan, deglaze with a splash of dry white wine (we used pinot grigio), add chopped tomatoes and olives and simmer for a few minutes.
  5. In a large salad bowl toss arugula with freshly squeezed lemon juice (1 lemon or more to your preference), a drizzle of olive oil and some pepper.
  6. To plate, put a small bed of arugula, top with squid, tomatoes and olives!

Monday, March 28, 2011

Listen: Oscar Lopez - Guitarras from Heaven

For music mondays, I am sharing a classic from one of my favorite Spanish guitarists.

This week, I will be sharing different recipes from Spain so that, should you desire, you can host a Spanish dinner party next weekend! Stay tuned...

Sunday, March 27, 2011

Bake: DeliciousLA Banana Chocolate Chip Bread


Most of the best recipes have a story behind them. There are many different ways to make banana bread - this is the recipe I've been using since high school.  I had a friend named Ellen with whom I'd rollerblade or bike with after school. We had a tradition of making the bread and popping it in the oven before heading  outdoors. Then about an hour of exercise later, we'd go back to her house and eat warm yummy banana bread fresh out of the oven!  This is her mom's secret recipe + chocolate chips. It yields a less sweet, light colored banana bread that pairs really nicely with a few chocolate chips.

Delicious LA Banana Chocolate Chip Bread. 
Ingredients:
  • 1 stick butter (1/2 cup)
  • 1/2 cup sugar
  •  2 eggs
  • 1 3/4 cup flour
  • 1 tablespoon baking powder
  • 1/2 teaspoon salt
  • 3 extremely ripe bananas
  • 1/2 teaspoon vanilla
  • A handful or so of chocolate chips (as many as you like!)
Directions:
  1. Preheat oven to 350 F
  2. Mash bananas in a small bowl - set aside
  3. Cream butter and sugar in a large bowl, add eggs one at a time, add vanilla
  4. Mix Flour, baking powder and salt in a separate bowl
  5. Add to dry mixture to butter/sugar/egg mixture, add mashed bananas, stir to blend (batter will be lumpy!)
  6. Pour into a loaf pan. Bake for 50-60 min or until done. 

*Variations: I usually add a generous shake of ground cinnamon. Sometimes, I substitue 1/4 c of flour with 1/4 cup instant oatmeal. 

Friday, March 25, 2011

Cook: Incredible Roast Chicken & Potatoes Dinner


We have been wanting to try Thomas Keller's (of the famed French Laundry) "My Favorite Simple Roast Chicken" recipe for a while. We finally made it last weekend and it was AWESOME. I'm sharing the recipe today so that maybe you can make it this weekend! It's an incredibly easy recipe so don't hesitate to try it. It would work great on a weeknight as well.  We made only very slight modifications to the original recipe shared on epicurious, here is our version.

DeliciousLA 5 lb Roast Chicken and Potatoes (makes 4 to 6 servings)

Ingredients:
  • One 5 to 6 pound farm raised chicken
  • Kosher salt and freshly ground black pepper
  • a few thyme sprigs, plus some 2 Tablespoons minced thyme
  • a few rosemary sprigs
  • Baby Potatoes (we used a 1.5lb bag of Dutch Yellow baby potatoes), sliced in half
  • a little bit of salt 
  • 3 garlic cloves sliced 
  • a couple of rosemary sprigs
  • Drizzle of Olive oil
* You will also need some kitchen twine
* Dijon mustard to serve


Directions:
  1. Preheat the oven to 450 F
  2. Rinse the chicken, then dry it very well with paper towels, inside and out. (The less it steams, the drier the heat, the better)
  3. Salt and pepper the cavity, stuff a few sprigs of thyme and rosemary in the center
  4. Truss the bird. See this video to learn how. 
  5. Salt the chicken, TK recommends "raining the salt over the bird so that it has a nice uniform coating that will result in a crisp salty flavorful skin (about 1 tablespoon).   Season with pepper
  6. Place the chicken in a roasting pan (we didn't use the rack).
  7. Prepare the potatoes (halved) by tossing with a drizzle of olive oil (it doesn't need much as later it will cook in chicken fat) with sliced garlic, rosemary springs, and a little bit of salt.
  8. Add potatoes to pan surrounding the chicken. Place pan in the oven. 
  9. Roast until the chicken is done (the potatoes take the same time) - our chicken took about 60 minutes but cooking times may vary based on your oven. The best way to test doneness is with a meat thermometer. The thighs should be 185F, and the breast should be 165F
  10. Remove from oven, and add the minced thyme to the pan. 
  11. Baste the chicken with the juices and thyme and let rest for 15 minutes on the cutting board.
  12. Remove twine.  Removed legs and thighs and then keep on eating!!!
TK recommends serving with mustard on the side, and slathering the meat with butter. We didn't do the butter part as the chicken was plenty juicy and rich already. This recipe really was worth all the hype. It was the best homemade roast chicken either of us had ever eaten. We served it with delicious beet, gorgonzola and spiced pecan salad and a buttermilk biscuit. Yum!


Thursday, March 24, 2011

Cook: DeliciousLA Beet Gorgonzola and Spiced Pecan Salad

This super tasty and sexy salad is incredibly easy if you are able to get a couple of key ingredients from Trader Joe's.  If not, you can still make it following this recipe on epicurious.

Ingredients:

  • one box trader joe's steamed and peeled ready to eat baby beets
  • 1/2 cup crumbled gorgonzola cheese
  • 1/3 cup trader joe's sweet and spicy pecans, broken into pieces
  • 1 bag (I think 12 oz?) of spring salad mix
  • olive oil   (3 or 4 tablespoons)
  • sherry wine vinegar   (3 to 6 tablespoons, depending on our preference)
  • 1 large garlic clove pressed
  • pinch of sugar
  • sea salt

Directions:
  1. Slice beets into 1/2 centimeter thickness or as desired, put aside
  2. Place spring mix into a large salad bowl, with gorgonzola cheese and pecans
  3. add beets, but reserve a few slices for garnish
  4. In a separate bowl, prepare the dressing.  Although most recipes call for lot of oil, I prefer to use at most a 1:1 ratio of oil:vinegar, sometimes even 1:2.  Whisk to mix the olive oil and sherry wine vinegar, garlic clove and pinch of sugar. Salt to taste. 
  5. Pour dressing over salad and toss gently to coat.
  6. Plate into serving dishes, add beets on top for garnish. Add more cheese/pecans if desired.
Enjoy!

Wednesday, March 23, 2011

Maybe Eat: Wood & Vine, Los Angeles, CA

One of J's foodie friends told him about this new place that opened in Hollywood that was supposed to be fantastic.  When I found out chicken and waffles were on the menu, I was sold. For those of you who don't know me, fried chicken is one of my favorite comfort foods. When pies and thighs in Brooklyn NY closed down, I was heartbroken. They had the BEST chicken biscuits I've ever tasted.  I did eventually find very good fried chicken at Tupelo in Cambridge, MA... but now that we're in LA, I have to find a solid fried chicken spot here!

The menu at Wood and Vine was well thought out, and reminded us of some of our other favorite places on the West Side - Venice Beach Wines or Gjelina.  The back patio reminded me of summer nights in Brooklyn, NY with the string of lights and fire pit. We were off to a good start...


We started with the "Avocado and Grapefruit Salad - butter lettuce, cilantro, champagne vinagrette." $8. When it arrived at our table, we could not help but notice the lack of grapefruit (1 sliver in the left lower corner) and avocado (J almost couldn't find it!).  Maybe they were trying to be subtle, but it was too subtle for our tastes.  To put it bluntly, the description was a lot more exciting than the actual taste of the salad.


The next dish we tried was the grilled scallops with truffled grits and wild mushrooms.   With a name like that, we were expecting a party in our mouths. Alas, it was not. The flavors didn't really come together,  and it tasted boring.  Definitely overpriced at $16.


Fortunately, the fried chicken and waffles did dazzle. The house made waffles were a perfect compliment to the nicely fried chicken and the maple roasted squash tied it all together. One of the best interpretations of this southern classic dish.  Bravo! While $14 seemed a bit steep for the amount (I think I could have eaten two of these by myself, and I wasn't even that hungry!), at least this dish was something exciting.


So in the end, we liked it, but didn't love Wood and Vine. This is great spot to grab a bite if you're heading to a show across the street at the Pantages Theater, but we both agreed that we wouldn't make a trek out from the west side just to eat there.


Wood & Vine
http://www.woodandvine.com/
6280 Hollywood Blvd
Los Angeles, CA. 90028
(323) 334-3360
Mon-Fri 5pm-2am
Sat-Sun 4pm-2am

Tuesday, March 22, 2011

Red Velvet: Bricks and Scones


Last weekend, I needed to pass some time while J was at his guitar class in Hollywood so I searched yelp.com on my iphone for nearby coffee shops.  I found Bricks and Scones, and am so glad I did. It was awesome.


This is the kind of coffee shop that I love to study and read in.  It was full of cozy couches indoors and on nice days, they have a fabulous patio.  They serve intelligentsia coffee, have free wifi and plenty of power outlets.


They are known for their scones - I tried the blueberry. It was solid.


But the icing on the cake, was their red velvet. I only bought a mini cupcake since I was so full from all our eating that day.  When I got home and had it later for dessert, I regretted that I hadn't bought more. It was delicious. The cake was flavorful (I think more than the usual amount of cocoa and vanilla), moist and light. The buttercream frosting perfectly complimented the cake.  I give it an A - which puts it up there with Sprinkles.


I wish this was on the West Side. If it was, I'd probably be there every day. Nonetheless, I'm happy to have found my favorite coffee shop in LA. :)

Bricks and Scones
www.bricksandscones.com
403 North Larchmont Blvd
Los Angeles, CA 90004
323-463-0811
Mon-Thu 7:30 am - 10pm
Fri 7:30am -6pm
Weekends 8am- 10pm.

Monday, March 21, 2011

Sunday, March 20, 2011

Must Eat: Gardena Ramen


We've always enjoyed ramen, but really developed a love for it after trying the versions at Ippudo and Momofuku in NYC.  In fact, we love Ippudo and Momofuku so much that we would make it a point to make it to at least one, if not both, every time we used to visit the city. 

Since moving to LA, we have tried a couple places, but still had not found a place that we really liked. Yesterday, we happen to be running errands in South Bay, and decided to give Gardena Ramen a try after reading through numerous ramen reviews from yelp and www.rameniac.com.  

We are really glad we did. J says that it is his favorite in LA. I'd have to agree. While there are more popular spots (on our to try list!) for ramen in Torrance/Gardena, this one appealed to us because of it's no frills, simplistic approach to ramen. Rameniac called it "Real Ramen...The best ramen in Southern California."

We pulled into a strip mall, and entered an unassuming little restaurant with booths and only another couple. We saw only one man, who we are guessing is the ramen chef and owner of the store.  We knew from reviews that there was a very limited menu (3 items - 2 types of ramen and gyoza as an appetizer - there may be a 4th of curry but if so, it's only advertised in japanese)   

Gyoza
These were a pleasant and light appetizer. Not particularly remarkable, but that's not why we came. 


J ordered the Shoyu Ramen. The shoyu broth was complex, soothing, yet light. The noodles were perfectly al dente, a nice thickness and very delicious. For more details about the process of making the soup base (arguably the most important component to ramen), please visit the link above to rameniac's blog. 

I had the Miso Ramen. This one does not appear to be as popular among foodie fans (the shoyu is so good, so it appears that most people stick with that choice!) but I really enjoyed it.  The flavor is not quite as subtle as with the Shoyu soup base, but it was nicely balanced and very comforting. 

This is a solid ramen spot.  It is simple yet very very satisfying. For $6.50 per bowl, the ramen makes for a filling and delicious meal.

Gardena Ramen
1840 W 182nd St
Torrance, CA. 90504
310-324-6993
Mon-Sun 11:30-2:30 pm
Mon-Sun 5- 9pm


Saturday, March 19, 2011

Cook: Red Lobster's Cheesy Garlic Biscuits!

This recipe is courtesy of our dear friend S, who along with her other half A, loves delicious food as much as we do.  Although she is a foodie who enjoys fine dining, she revealed recently that she has a soft spot for Red Lobster. So, when she came over for dinner the other night, she made these awesome cheesy biscuits (inspired by RL) to go with our baked cod dinner.  What a treat!

Cheesy Biscuits

Ingredients:
  • 2 1/2 cups bisquick baking mix
  • 1 cup cheddar cheese; finely grated
  • 3/4 cup Whole milk
  • 2 tablespoons butter, melted
  • 1/8 teaspoon garlic powder
  • 1/4 cup butter
  • 1/2 teaspoon garlic powder
  • 1/2 teaspoon dried parsley flakes
  • 1 dash salt
Directions:
  1. preheat oven to 400F
  2. Combine bisquick with cheddar cheese, milk, 2 tablespoons of melted butter, 1/8 teaspoon garlic powder in a medium bowl. Mix until well-combined
  3. Drop approximately 1/4 cup portions on the dough onto an ungreased cookie sheet.
  4. Combine 1/4 cup butter with 1/2 teaspoon garlic powder, parsley flakes and salt. Brush this mixture over the tops of each unbaked biscuit.
  5. Bake for 14-16 minutes or until tops of biscuits begin to turn light brown. Serve warm.

Thursday, March 17, 2011

Cook: Baked Cod with mozzarella and tomato by Jamie Oliver


The way to a wo(man)'s heart is through her stomach. This is one of my favorite dinner dishes by J.  He is a truly fantastic cook and I am so lucky. :) The great thing about is dish is its simplicity. Believe it or not, but we make this on weeknights! It takes less than an hour to prepare and is so satisfying! We usually serve it with chard or a side salad. 

Prep time: 10 minutes
Cook time : 20 minutes
Total Time: 30 minutes!

Ingredients:
  • 2 8oz cod fillets (skinned)
  • olive oil
  • sea salt and freshly ground black pepper
  • 2 handfuls red and yellow cherry tomatoes, halved 
  • 1 handful of fresh basil leaves, torn into pieces
  • 1 ball buffalo mozzarella, finely sliced (we use a little more! :)
  • 1 handful of grated Parmesan cheese
Directions: 
  1. Preheat oven to 425 F
  2. Place cod fillets in an oiled roasting pan or earthenware dish. Drizzle with olive oil and season with salt and pepper.
  3. Place the tomatoes, basil and mozzarella slices to cover the top of the fillets. 
  4. Sprinkle parmesan over the top
  5. drizzle with some more olive oil
  6. Bake at top of preheated oven for 15-20 minutes until cheese is melted and golden. 
Yield 2 servings (can be doubled, and we usually do because it is soooo delicious!) 

Recipe source: Happy Days with the Naked Chef by Jamie Oliver. 

Wednesday, March 16, 2011

Cook: Parmesan Crusted Baked Kumato Tomatoes


I was buying produce at Trader Joe's the other day, when I came across these beautiful and exotic tomatoes. J loves tomatoes, and we recently enjoyed the fried tomatoes he made. We were craving them again, but wanted to a healthier (baked, not fried) version.


I decided to try out a new recipe with these tomatoes - I loosely followed the recipe on the Kumato website.

Ingredients:

  • 4 (or more, depending on your appetite!) Kumato Tomatoes, cut in half
  • 3/4 cup panko bread crumbs
  • 1/2 tsp (or a few shakes of) fresh cracked black pepper 
  • 1 tsp lemon zest, grated
  • 2 tablespoons butter, melted
  • 4 tablespoons parmesan cheese, grated (I used a combo of parmesan/romano that I already had in our fridge)
  • 1/2 teaspoon oregano
Directions:
  1. Preheat oven to 400 F
  2. Lightly oil or spray with PAM cooking spray a baking pan.
  3. Arrange tomato halves cut side up in the baking dish
  4. In a medium bowl, toss bread crumbs with pepper, lemon zest, melted butter and parmesan cheese until well blended.
  5. Sprinkle each tomato half with the crumb mixture, and bake for 20-25 minutes until crumbs are golden brown.

* If you can find them, Kumatos are quite delicious! :) Otherwise, you can probably make this with any firm tomato.  I had oregano on a whim but you can add different seasonings to your liking. I actually had quite a bit of crumb mixture left over, so you can probably use it for more servings of tomatoes, depending on the size.  


Tuesday, March 15, 2011

Cook: Baked Sweet Potato

I like to post easy recipes because a lot of our friends have asked - "How do you guys eat like that (both of us work full time in pretty demanding fields) on a weeknight?" The most important secret, is keeping your fridge well stocked (F stops at the grocery store on the way from home 1-2 times a week). The second tip is knowing how to make things that require little prep or fuss.

This is probably the easiest recipe ever.  To make baked sweet potatoes as a side, preheat oven to 400F. Wash and dry two sweet potatoes (for 2 servings), place on a baking sheet or pan. Roast until done (30-40 min).  If you want, you can add butter and/or cinnamon, but we find them plenty delicious on their own.

We served them with roasted brussel sprouts (recipe also posted today), baked tomatoes (recipe posted tomorrow) and pork chops.

Cook: Roasted Brussels Sprouts

J and I both hated brussels sprouts when we were kids. But now, we love them!


What changed? Well, they became trendy in the past few years, and we decided to give the "superfood" another shot.  We were skeptical the first time we ordered them at a restaurant, but were blown away at how delicious they were. The roasted brussels sprouts were caramelized and melted in our mouths, not at all like the bitter predecessors we had eaten in our childhoods.

Roasting brussels sprouts is incredibly easy and makes for a great nutritious side.  We loosely follow this recipe by Ina Garten, varying the quantity or sometimes throwing carrots into the mix.  The basic is to lightly coat the sprouts with olive oil, salt and pepper.

Ingredients

  • 1 1/2 pounds Brussel Sprouts
  • 3 tablespoons good olive oil
  • 3/4 teaspoon kosher salt
  • 1/2 teaspoon freshly ground black pepper
Directions:
  1. Preheat oven to 400 F
  2. Cut off brown ends of the Brussels sprouts and pull of any yellow or dried outer leaves. Mix the brussels sprouts in a bowl with the olive oil, salt and pepper
  3. Pour them on a sheet pan and roast for 35-40 minutes (time may vary depending on your oven), until crisp on the outside and tender on the inside.
  4. Shake pan from time to time to brown the sprouts evenly.
  5. Serve immediately (If desired, may sprinkle with more salt )


Monday, March 14, 2011

Listen: Adele - Rolling In The Deep

My friend Stephanie Wang (who is an awesome actress!) introduced me to Adele. What an amazing and powerful voice!

Sunday, March 13, 2011

Do: Hike Solstice Canyon, Malibu, CA


I'm introducing a new category (see "labels" for the others) today!  Living deliciously is not just about eating good food, it is about living life to the fullest, and appreciating both the small and big wonders in the world.

Yesterday, we went for a hike @ Solstice Mountain in the Santa Monica Mountains. It was highly recommended by a friend and we'd been talking about going for a hike for a while.  We are so glad we did it - we had an awesome time! The wildflowers were in bloom and the scenery was amazing.

If you live in LA and are looking for something fun to do, I urge you to go on this hike! It took about an hour to an hour and a half to complete the 3 miles. We went up the Rising Sun Trail (easy-moderate) and came back on the TRW trail (very easy). There is a special surprise halfway - a ruin of an old mansion and a waterfall!  Here are some of the photos from our hike:

Saturday, March 12, 2011

Must Eat: Sugarfish by Nozawa, Santa Monica

Last night, J and I decided to take a break from cooking (we've been on a 2 week stretch!) and treat ourself to a nice sushi dinner. Lucky for us, Sugarfish by Nozawa just opened a fourth restaurant in Santa Monica!   We were excited because it had received a 5 star review on yelp.com and despite the loads of sushi restaurants in LA, we hadn't found "the One" yet.  

We walked in around 8pm on a Friday night, and to our delight, were seated right away!  They offer three "omakase" (aka price fixe) combinations - Trust Me/Lite $19; Trust Me $28 and the Nozawa for $35-38.  I decided to go with the "Trust Me",  and J went with the "Nozawa." We ordered a Sapporo to share.  I loved everything - the fish was so fresh, the rice perfectly seasoned (there was no need for any additional soy sauce or wasabi) - the sushi literally melted in my mouth.

Organic Edamame

Tuna Sashimi (big eye)

Salmon Sushi
Albacore Sushi

Halibut Sushi

Yellowtail Sushi

Toro Hand Roll

Crab Hand Roll

As some other reviewers have noted, this is a meal that will really satisfy you, but won't leave you stuffed. We really enjoyed our dinner there, and will be back again for sure!

Sugarfish by Sushi Nozawa
1345 2nd St
Santa Monica, CA
310-393-3338
www.sugarfishsushi.com

Thursday, March 10, 2011

Cook: Oven-Roasted Salmon with Roasted Parmesan Broccoli

For those of you who think cooking is too much work, give this recipe a try.  This tasty and healthy dinner for two took less than 5 minutes to prepare, and 15 minutes to cook!  I modified recipes from food.com.  The trick is that both the Salmon and the Broccoli can cook on the same baking sheet (I put them on two different sides) at 450 degrees.

Oven-baked Salmon

Ingredients:

  • Salmon Filet cut into whatever size pieces you like to eat. :) (I used skinless 6 oz piece cut into two portions) 
  • Olive Oil
  • Salt and Pepper
  • Lemon

Directions:

  1. Preheat oven to 450 F
  2. drizzle salmon with a little olive oil and sprinkle with salt and pepper on both sides. 
  3. squeeze the juice of 1/2 lemon over the fillet.
  4. Place on a nonstick baking sheet. 
  5. Bake until cooked through 12-15 minutes
  6. Serve with lemon wedge.
Roasted Parmesan Broccoli

Ingredients:
  • 2 Broccoli crowns (or more if you like)
  • 1-2 garlic clove, sliced
  • breadcrumbs
  • grated parmesan
Directions:
  1. Preheat oven to 450 F
  2. Blanched chopped broccoli (use florets, discard thick stem) in boiling water with salt and sliced garlic for 1 minute; drain
  3. Toss with a splash of olive oil, a handful each of breadcrumbs and parmesan
  4. sprinkle with salt and pepper
  5. Place on baking sheet and top with more cheese and breadcrumbs
  6. Roast 12-15 minutes until done to your liking.  :)

Wednesday, March 9, 2011

Cook: Exotic Butternut Squash and Sweet Potato Soup!


I make butternut squash soup pretty often because it is nutritious and easy! I make it differently every time depending on what spices I feel like adding that night.  Sometimes I add Sweet potato which sweetens things up just a tad.  This is my latest version.   I usually don't use measuring spoons but just add the spices to taste so use the measurements as a guide, but feel free to modify and get creative! It is extremely healthy as there is very little fat and no dairy/cream!


If you use the quantities below, it makes a big pot (I'm guessing 8 servings)

Ingredients:
1 large sweet onion
1 lb sweet potato (or 1 large one) - peeled and cubed
2.5 lbs butternut squash - peeled and cubed (I used 3 12 oz bags of Trader Joe's pre- peeled and cubed butternut squash)
2 T butter
4 cups -6 cups chicken broth (feel free to substitute vegetarian broth)
2 teaspoons ground coriander
1 teaspoon ground ginger
1 teaspoon cumin (gives it a subtle curry kick! add more or less based on your preference)
splash of white wine (ok, more like 1/4 cup) I used asti since i had some leftover


Directions:
  1. Melt butter in large stockpot over medium heat. Add onions and saute until soft and translucent.
  2. Add Sweet Potato and Butternut Squash, stir to coat evenly and cook for a few minutes 
  3. Add Chicken Stock to cover squash (see photo above)
  4. Add spices that you desire (other options include cinnamon & nutmeg) 
  5. Bring to a boil. Reduce heat to low and simmer until squash is tender (about 30 min)
  6. Puree soup using hand blender 
  7. Add salt and pepper to taste